Musical Notes
Create successful practice, explore a composer's historical lifestyle, learn about modern composers, experience local performances - Musical Notes will enhance your music education and capture your imagination. Be Inspired!
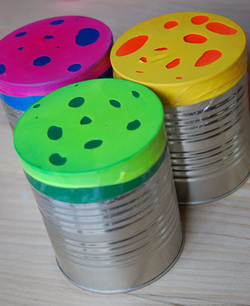 Who knew that some colorful balloons and empty containers could make such a fun and crazy instrument? Thanks goes out to KidsActivityBlog for this idea, though I have modified it to fit with the items we have here at our house: Small Containers - a sturdy mason jar works really well, if your kids won't be throwing it around. You can also use cans, as pictured, but avoid sharp edges that can cut little fingers! Balloons - if you're container has a wide opening (like a small oatmeal canister), you'll want to use big balloons. The mason jar I used handled the regular-sized balloons well. Scissors - if you want to double layer your balloons (as shown), you can place a solid balloon below and cut holes in a second balloon to stretch over top. Packing Tape (optional) - For cans or oatmeal canisters, you'll probably need packing tape to keep the balloons in place. My mason jar drum didn't need tape - the ridges on the mouth held the balloon in place very well! Let's get to work: Use your scissors to cut the neck of the balloon off. Stretch this first balloon across the mouth of your container and tape in place (if needed). If you're adding a second balloon, cut the neck off and cut several small holes in the top of the balloon. Stretch the second balloon over the first balloon and tape in place (if needed). You're ready to make some music! Drum along with the beat as you listen to your favorite song. Make up some rhythms of your own! An idea to try: Take several mason jars and fill them with water. Create your drums. Do the drums have different pitches? Can you "play" a song on your new drum set?
0 Comments
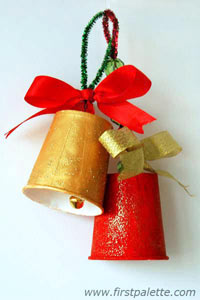 Gather these few materials and make some Christmas jingle bell music... Here's what you need: Paper Cups Pipe Cleaners Big Beads Jingle Bells Ribbons Paint Paintbrush Glitter (optional) Scissors What a fun musical Christmas project! Whether your colors are reds, golds, and greens or blues and silvers, paint these crafty little bells to match your holiday decor, and you have new ornaments for your tree. For the full instructions (and step-by-step pictures), visit the First Palette blog post. Your kiddos may even enjoy creating a bell ensemble as they play together and sing Christmas carols... 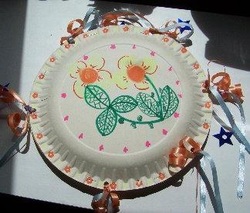 These homemade paper plate tambourines are an incredibly versatile craft. You can use plates that already sport a fun design, or plain white plates that can be colored or covered with tissue paper, stickers or sequins. Here's what you need: 2 Paper Plates (preferably heavy duty) Beans, Pasta or Rice (something to fill the inside) Stapler or Glue Hole Punch String, Yarn or Ribbon Jingle Bells (optional) Decorating Items - Crayons, Markers, Tissue Paper, Stickers, Sequins, etc. Place your filler inside one of the plates, and place the other plate over top - so that the inside of both plates are facing each other. Staple or glue both plates together. Using your decorations, make your tambourine colorful! If you're using jingle bells, you'll want to use your hole punch to put some holes around the edge, and than use string or ribbon to attach the bells. For some more fun decorating ideas visit this website. Put on some upbeat music and dance with your tambourine! How many different sounds can your new instrument make? What does the filling inside sound like? Maybe you'd like to make a couple tambourines with different things inside! Do the beans, rice or pasta all have different sounds? What types of sounds can you make with the jingle bells? 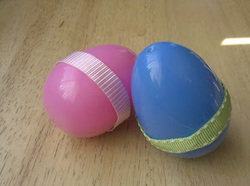 Make some colorful shakers with your left over plastic Easter eggs - next year! :) Materials: Plastic Easter Eggs (colorful or clear) Rice, Popcorn Kernels, or Colorful Sand Hot Glue Gun or Electrical Tape Ribbon (optional) Open each egg and fill halfway with your filling. If you're using a colorful egg, rice or popcorn kernels work great! If you have some clear eggs, you may want to consider using colorful sand. You can use the hot glue gun to glue the egg shut. If you want some extra color, then glue a small ribbon around where to two parts connect. 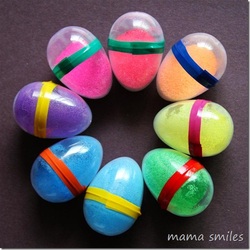 Now, if your children are like my boys, they will have the ribbon off and the egg opened as quickly as possible. A better option may be to use electrical tape to close your egg. Not only will it stretch around the egg and keep it closed, but it adds a ribbon of color - you may even be able to find some fun designs! These homemade instruments are the perfect size for little hands to gasp. Turn on the music and shake your eggs to the beat! 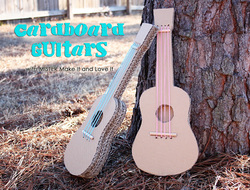 This week's idea comes from Make It & Love It blog. My little guys love to "play" the guitar, so I can't wait to give this project a try! You'll need several different materials - some you may find around your house, others you can find for free at your local grocery, office supply, or book store. A few you may need to buy. 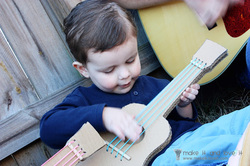 Materials: Pattern Templates found here Cardboard (used boxes work fine) Utility Knife Hot Glue Gun Four Large (7") Rubber Bands Two Paper Clips: 1" and 1-1/2" Wooden Pencil or Dowel For detailed instructions (complete with pictures), I'm going to send you on over to the Make It & Love It blog post: Cardboard Guitars. Have fun! 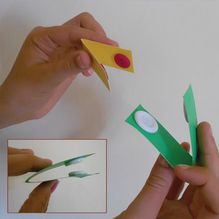 These colorful little castanets are perfect for little fingers to explore. Not only will your child experiment with rhythm, but he'll also work on developing his fine motor skills! Materials: Sturdy Paper like poster board or a manila folder Pairs of Buttons Hot Glue Gun or Elmer's School Glue Cut the paper into rectangles that measure anywhere from 4 to 6 inches long and 1/2 to 1 inch wide. Fold each rectangle in half so there's a crease in the middle. Next, choose two buttons and glue one on each end of the rectangle. The buttons will need to be the same size, and if your child is like my son, they'll have to be the same color too! Allow the glue to dry. Let the fun begin! What types of rhythms can you create with your new instrument? Can you click the buttons together fast and slow? Can you make a steady beat? How about tapping the rhythm of your favorite song with your castanets? Turn on some music and experiment with all different types of rhythm! ***If doing this craft with young children or with young children present, do be careful to keep an eye on the buttons. Don't let young children put them in their mouths!*** 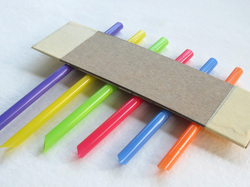 Pull out the scissors, drinking straws, and some tape to make this entertaining instrument. Materials: 4-8 beverage or milkshake straws scissors tape cardboard (optional) Cut the straws at different lengths, each one a half-inch shorter than the next one. If you can, cut at an angle. Line the straws in order from longest to shortest, and tape them together. Or you can tape them to the cardboard. You'll play your new instrument by blowing across the top of the flat side of the straw. What do you hear? Since these straws are plastic, you won't actually hear a sound, but you will hear a different pitches as you listen to the air move over the pipe. What songs can you play with your new instrument? 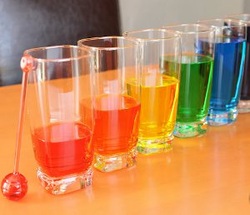 Here's a fun musical instrument that can be made with items you probably have around your home! Materials: 5-8 water glasses, all the same size water food coloring (optional) spoon Fill each glass with a different amount of water. If you’d like to make a colorful “keyboard” you can add some food coloring to the water. Use different color for each amount of water - You'll create a rainbow of color and sound!`` Now, try some of these fun musical activities: Experiment with the tone of the glasses. What happens when you add more water to the glass? What happens when you take some water out? Make a “keyboard” - organize the glasses from lowest tone to highest tone. Can you play a scale that matches the notes on your piano keyboard? Now, you can use your new keyboard to play a song. You may need to adjust the amount of water in some of the glasses to get the right tune. Tunes with 3-5 notes are great to start. Mary had a Little Lamb, or Are You Sleeping are two good options. Once you have your song perfected, make a video of your performance to share with your teacher during your next lesson! |
Jessica's Piano Studio
Jessica B.
Teacher at Jessica's Piano Studio to many talented students! Here's some helpful tips and interesting information to create a wonderfully educational musical experience! Archives
March 2015
Categories
All
|